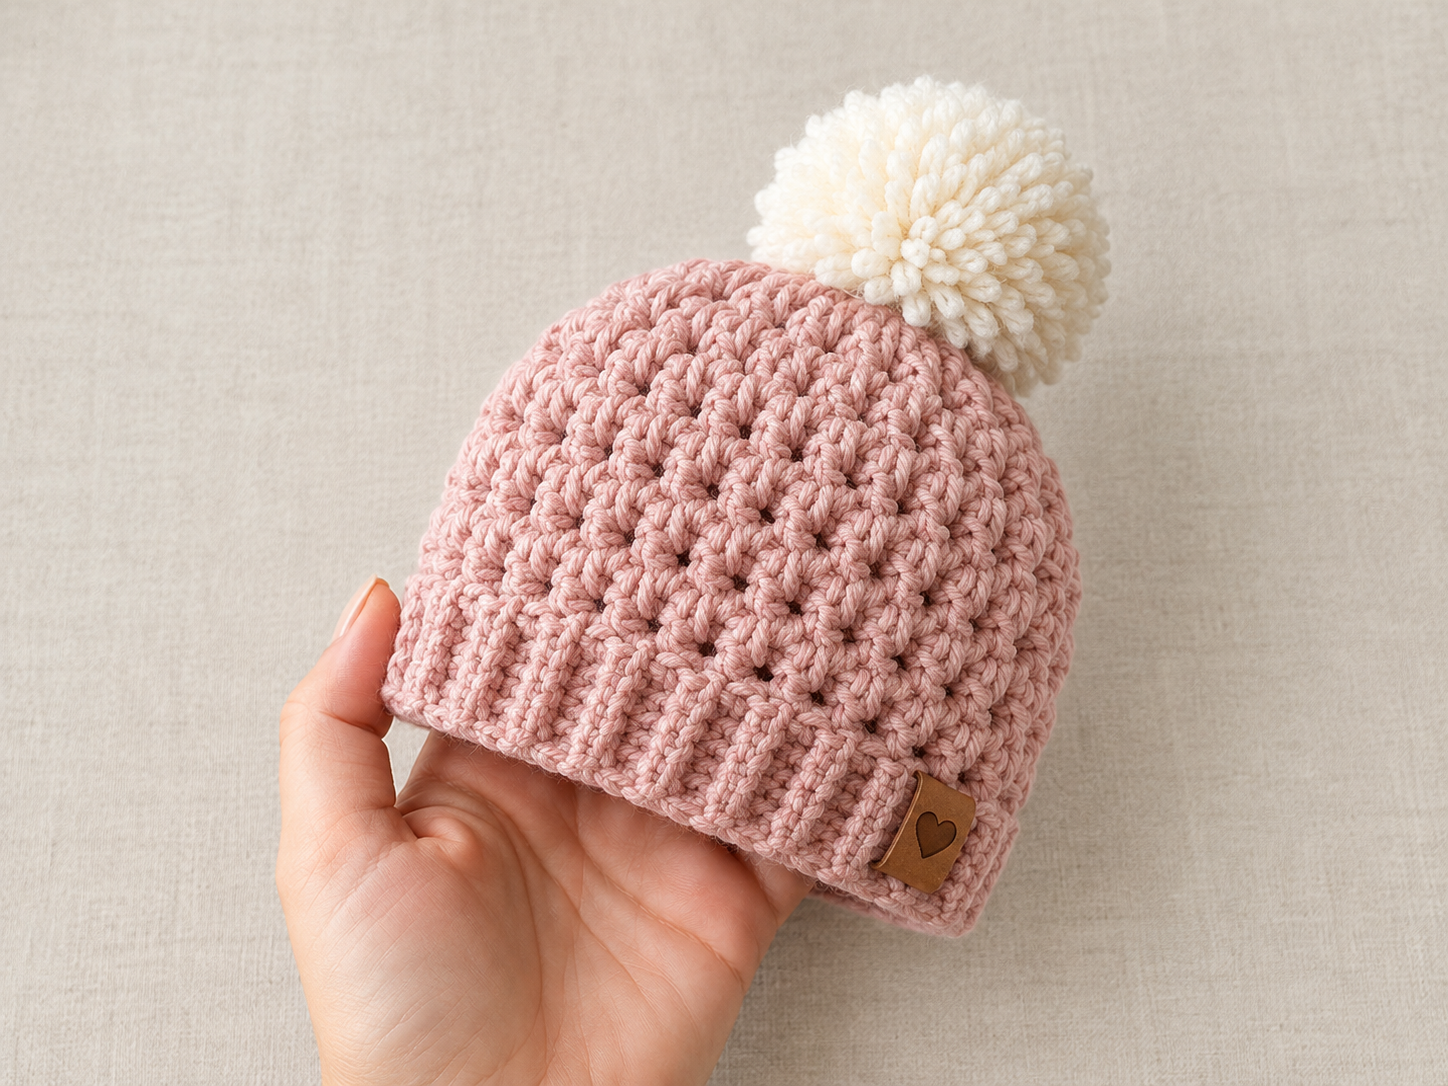

This cozy crochet hat is worked from the top down in a bumpy, textured stitch, with a ribbed cuff and a fluffy cream pom-pom. You will learn how to start a magic ring, shape a flat crown, work a simple textured stitch in the round, and make and attach a ribbed band. A small heart tag finishes the look.
Project Details
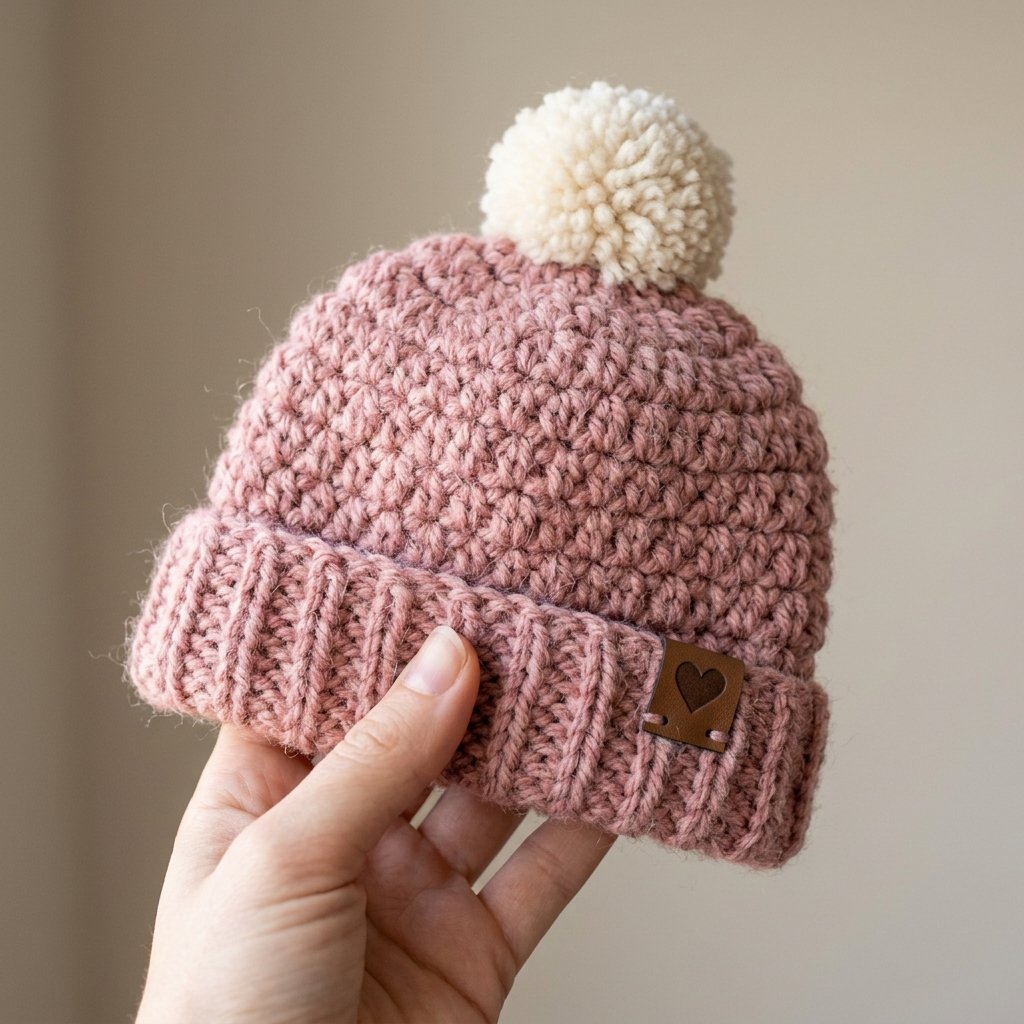
The reference image shows a dusty pink hat with a textured body, a vertically ribbed folded cuff, a cream pom-pom and a small brown heart tag. The image does not reveal the original pattern, so everything below is a Suggested Pattern that gives a similar look. The stitch used for the body is a simple alternative that creates a similar bumpy texture. The suggested size is a small baby hat, and it can be adjusted (see Tip 2).
What You Need
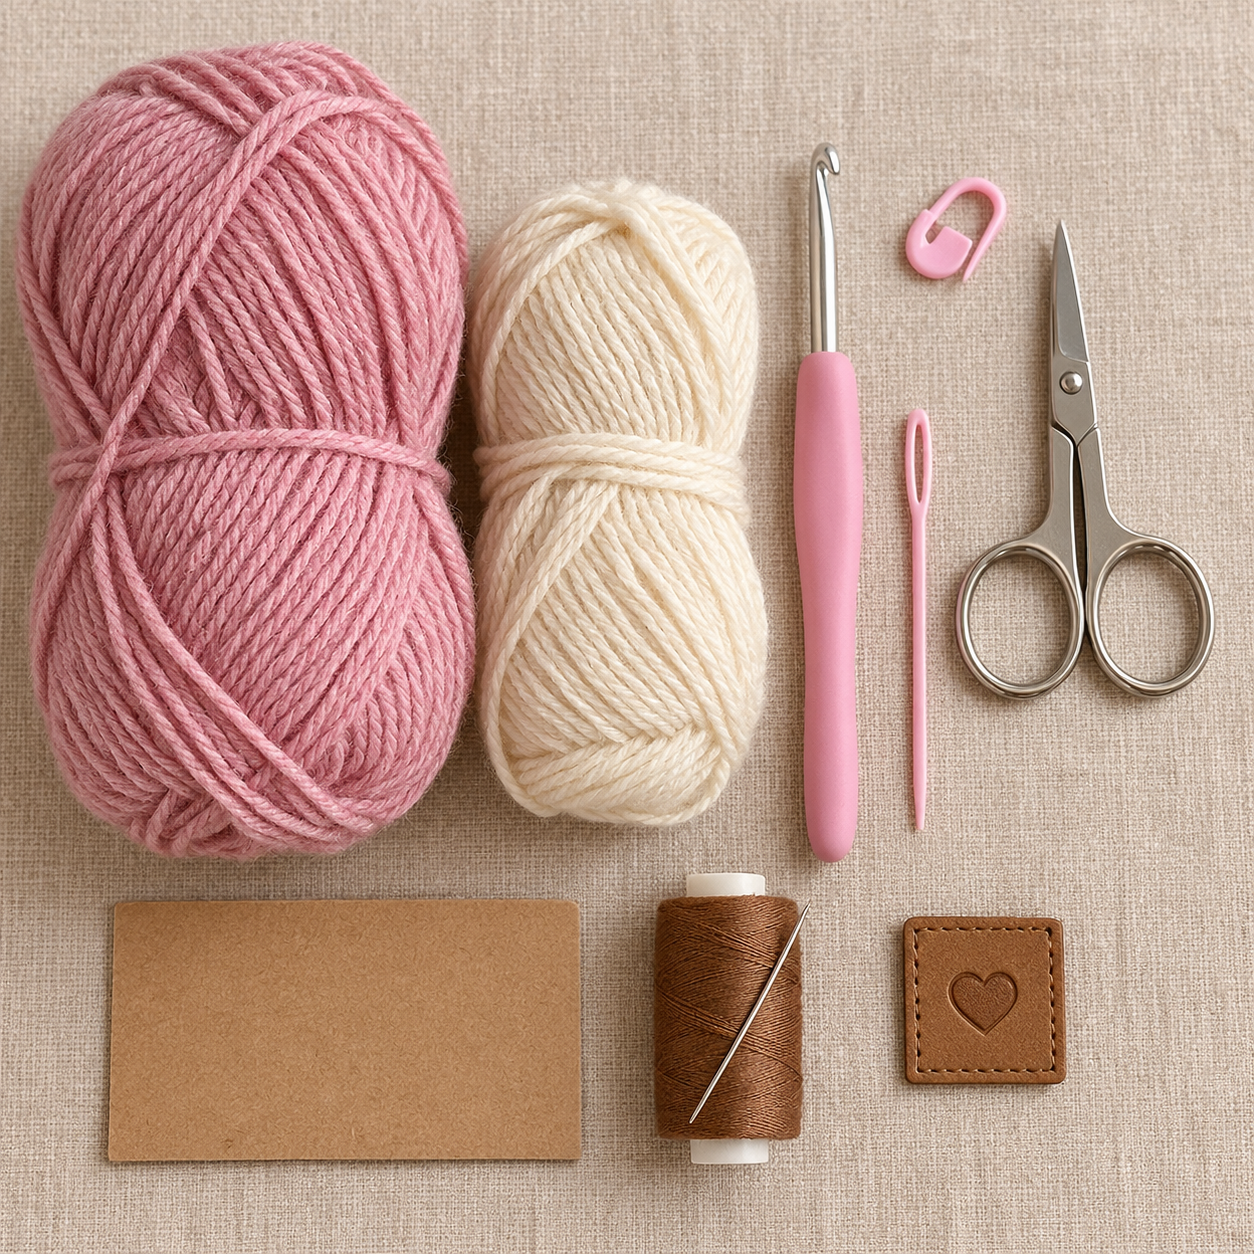
- Dusty pink (blush) medium weight (worsted) yarn, about 50 g (Approximate)
- Cream medium weight yarn for the pom-pom, about 15 g (Approximate)
- 5 mm crochet hook (Suggested; use a larger or smaller hook to change the fit)
- Stitch marker
- Scissors
- Yarn needle
- Small piece of cardboard (about 3 in / 7.5 cm wide) or a pom-pom maker
- Small faux leather tag with a heart (about 1 in / 2.5 cm)
- Sewing needle and brown or neutral thread to attach the tag
Abbreviations
- ch = chain
- sl st = slip stitch
- sc = single crochet
- hdc = half double crochet
- dc = double crochet
- inc = increase (2 stitches in the same stitch)
- st(s) = stitch(es)
- MR = magic ring
- BLO = back loop only
How to Make It
The hat is worked in a spiral, so you don’t join the rounds or turn your work. Place a stitch marker in the first stitch of each round and move it up as you go.
Step 1: Make a Magic Ring and the First Round
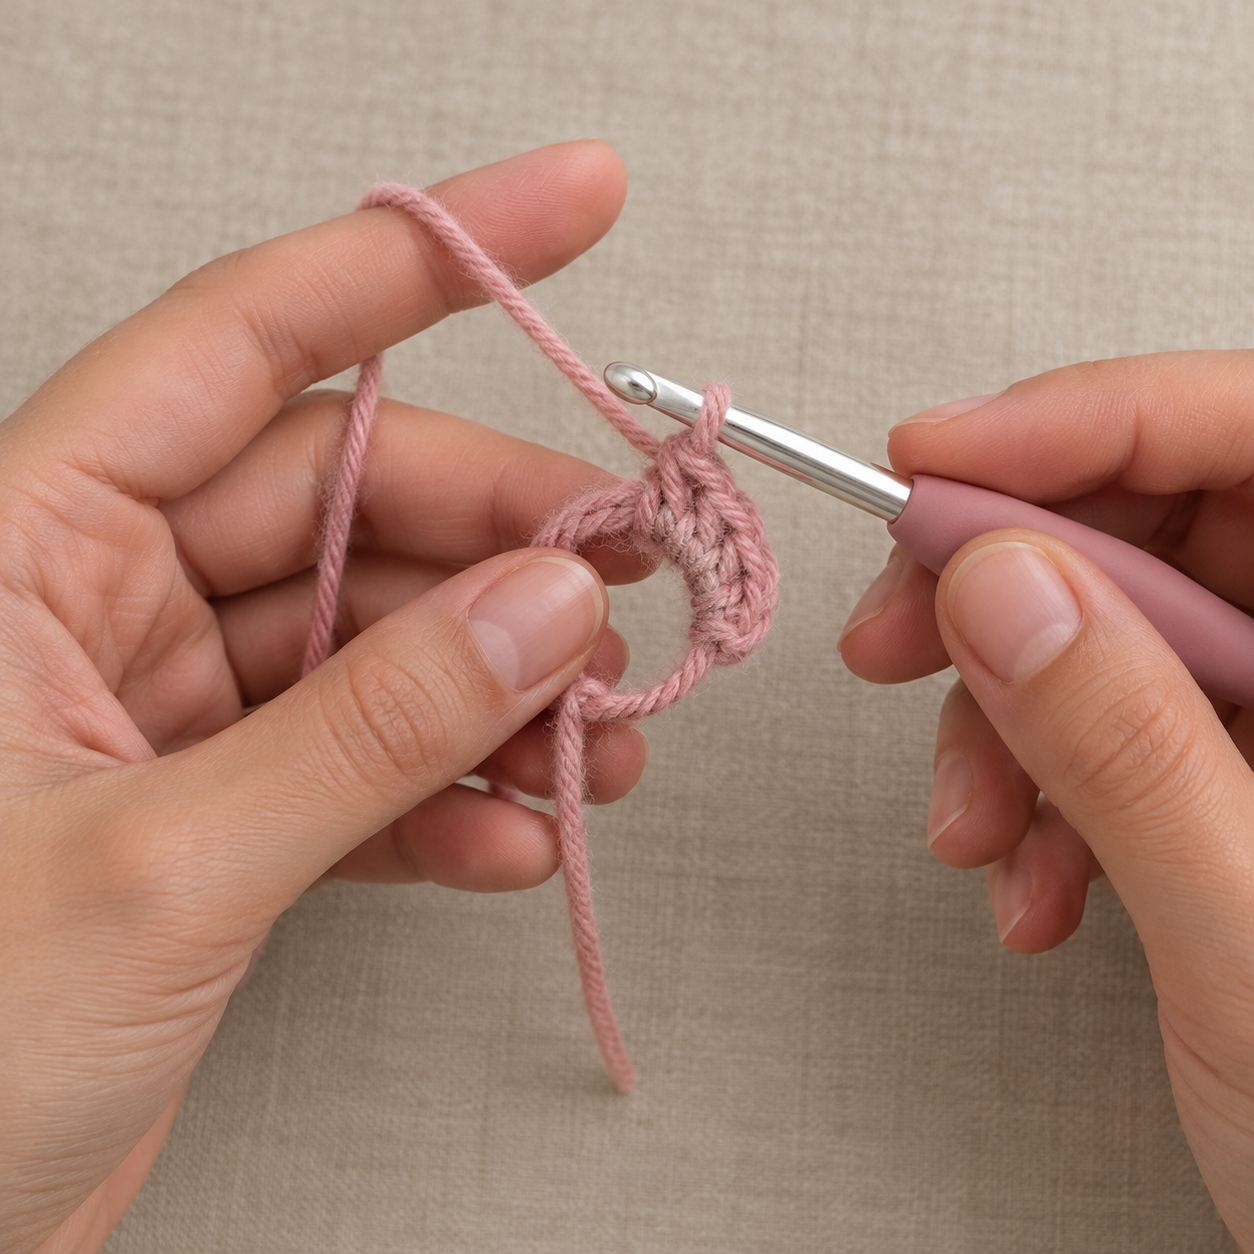
What to do: Start the crown with a magic ring and 12 hdc.
How to do it:
- Wrap the yarn around two fingers to make a loop, with the tail over the front.
- Insert your hook under both strands, pull up a loop, and ch 1 to lock it.
- For each hdc, yarn over, insert the hook into the ring, yarn over, pull up a loop (3 loops on the hook), then yarn over and pull through all 3 loops.
- Make 12 hdc into the ring, working over the yarn tail.
- Gently pull the tail to close the center.
Stitch count: 12 sts.
What it should look like: A small, tight circle of 12 hdc with no hole in the middle. Place a marker in the first stitch.
Step 2: Round 2 – Increase All Around
What to do: Double the number of stitches.
How to do it: Work 2 hdc in every stitch. Move the marker to the first stitch of the new round when you start it.
Stitch count: 24 sts.
What it should look like: A flat circle that is just starting to grow.
Step 3: Round 3 – Increase Evenly
What to do: Alternate single stitches and increases.
How to do it: 1 hdc in the next st, then inc (2 hdc in the next st). Repeat from * around, 12 times in total.
Stitch count: 36 sts.
What it should look like: A flat disc with six rounds of stitches radiating from the center.
Step 4: Round 4 – Finish the Crown
What to do: Work the last increase round.
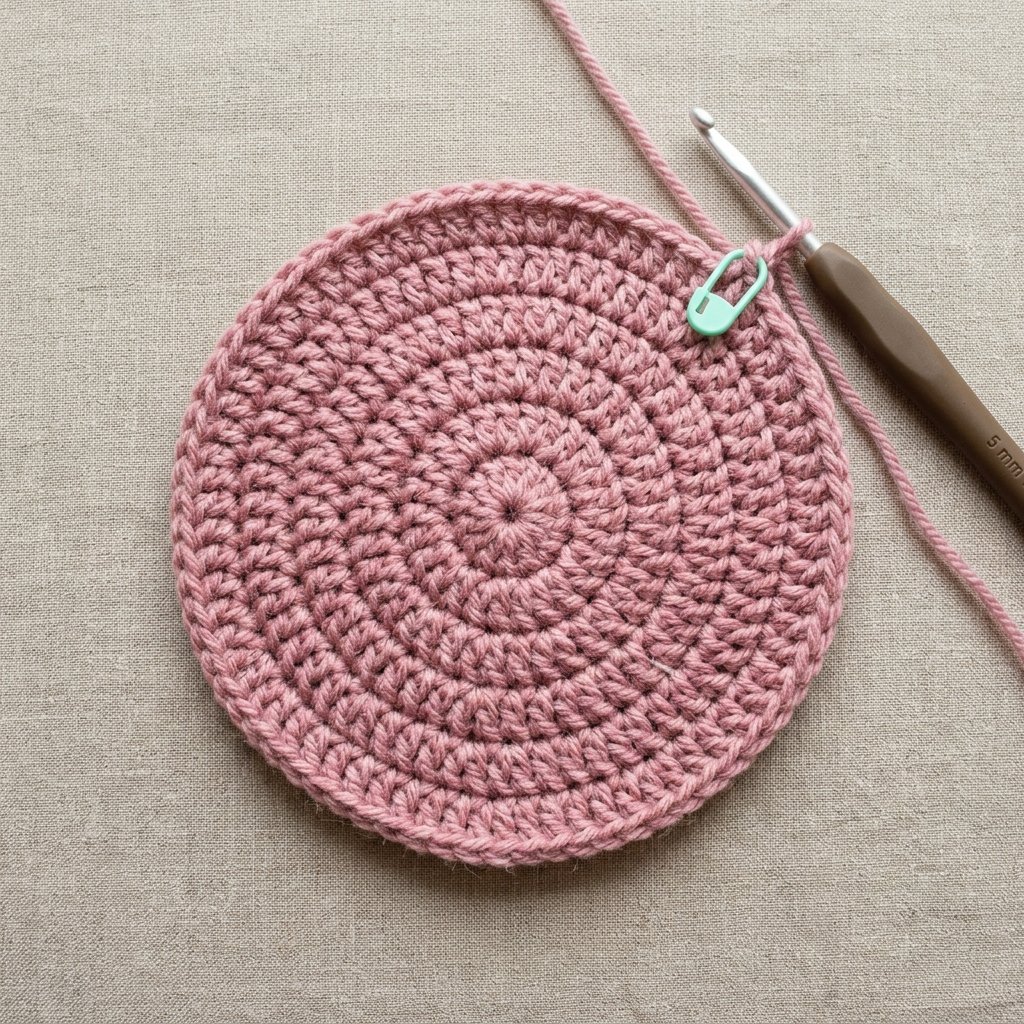
How to do it: 1 hdc in each of the next 2 sts, then inc. Repeat from * around, 12 times in total. Count your stitches.
Stitch count: 48 sts.
What it should look like: A flat circle about 4.5 in (11.5 cm) across (Approximate). If the edge ruffles, you have too many stitches, and if it curls into a bowl, you have too few. Fix this before moving on.
Step 5: Round 5 – Start the Textured Stitch
What to do: Switch from hdc to the textured body stitch.
How to do it: 1 sc in the next st, 1 dc in the next st. Repeat from * around, 24 times in total. Do not increase from now on.
Stitch count: 48 sts (24 sc and 24 dc).
What it should look like: The edge of the crown starts to turn downward and the sides begin to rise. Short sc and tall dc stitches alternate, giving a bumpy edge.
Step 6: Build the Textured Body
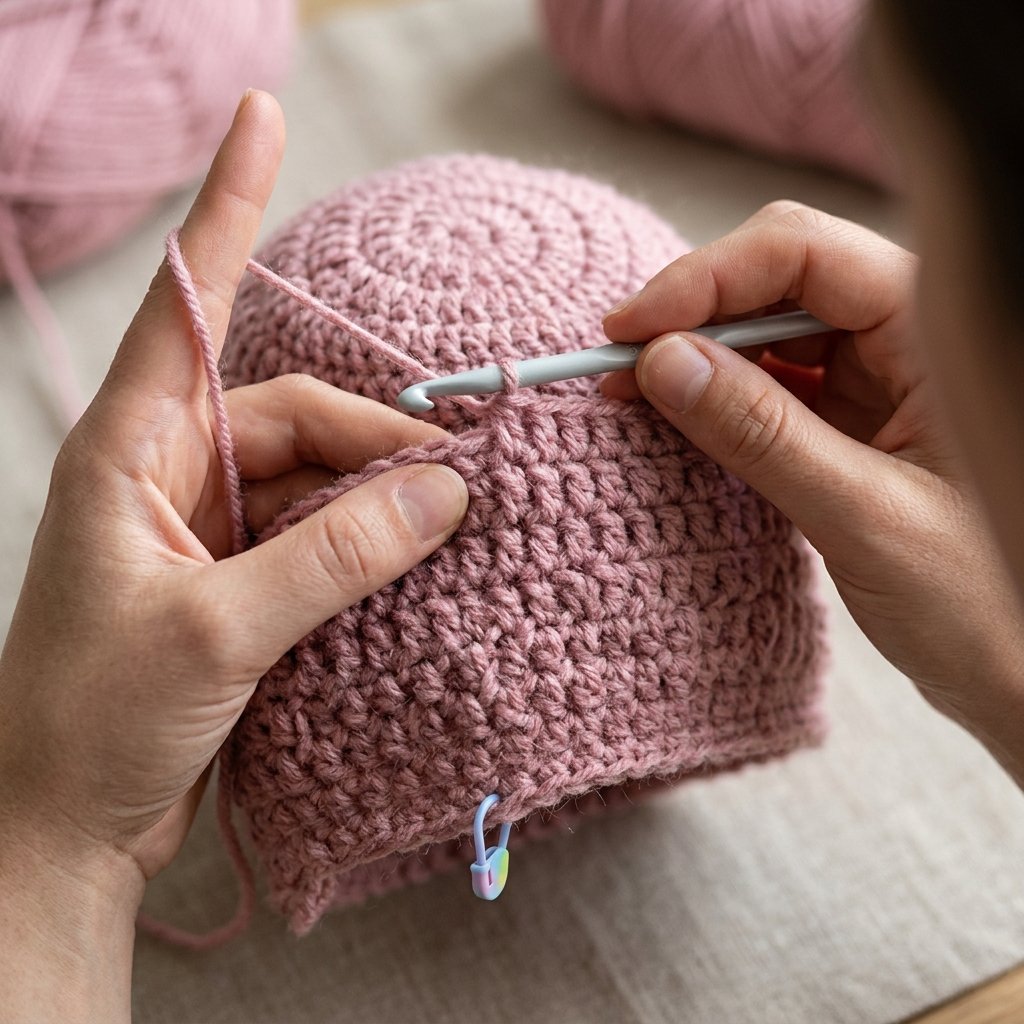
What to do: Repeat the alternating stitches, placing them in a staggered pattern.
How to do it: Work one stitch in each stitch of the previous round, using the opposite stitch type: work a dc into each sc, and a sc into each dc. Before you start each round, check the stitch below the first stitch to see which one comes next. Keep going for about 6 to 7 rounds (Approximate), until the hat measures about 5.5 in (14 cm) from the center of the crown straight down the side (Approximate). Make this the length you need before the cuff covers the bottom edge.
Stitch count: 48 sts every round.
What it should look like: A rounded hat with a bumpy, checkerboard-like texture. Tall and short stitches should sit staggered, not in straight columns. After the last round, work 1 sl st in the next stitch, fasten off and cut the yarn, leaving a 6 in (15 cm) tail.
Step 7: Crochet the Ribbed Band
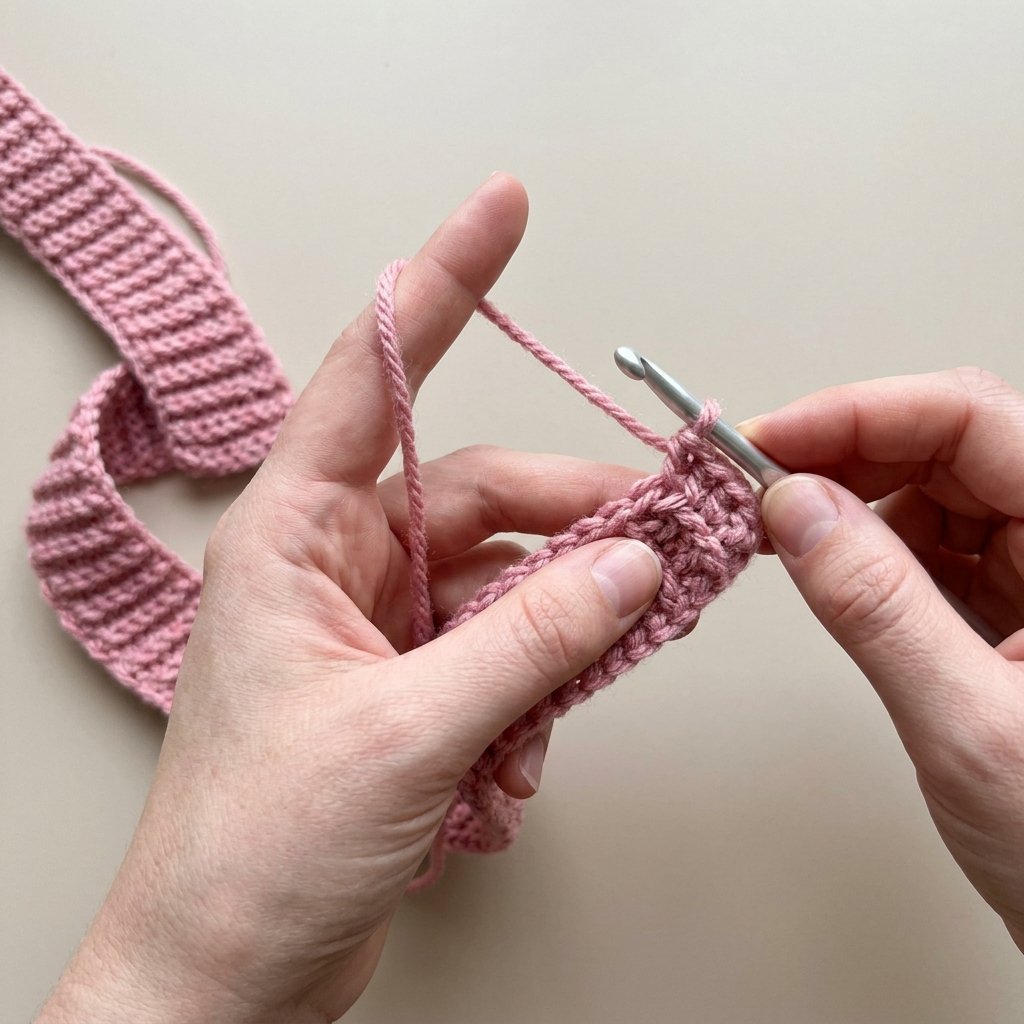
What to do: Make a separate rectangular band for the cuff.
How to do it:
- Using the same pink yarn, ch 9.
- Row 1: sc in the 2nd chain from the hook and in each chain across (8 sts).
- Row 2: ch 1, turn. Work 1 sc in the back loop only (the loop farthest from you) of each stitch.
- Repeat Row 2 until the band is about 44 to 48 rows long (Approximate), or until it is a bit shorter than the bottom edge of your hat. Stretched slightly, it should reach all the way around the opening.
- Fasten off, leaving a 24 in (60 cm) tail for sewing.
Stitch count: 8 sts per row.
What it should look like: A stretchy strip about 1.75 in (4.5 cm) wide with vertical ribs. Working into the back loop only makes the ribs.
Step 8: Join the Band into a Ring
What to do: Seam the short ends together.
How to do it: Hold the two short ends side by side, with the right sides facing the same way. Thread the tail onto the yarn needle and whip stitch the two ends together, passing the needle through the matching loops on each side, all 8 across. Do not cut the tail.
What it should look like: A ribbed ring with a flat seam. The tail should end at one long edge of the band.
Step 9: Sew the Band to the Hat
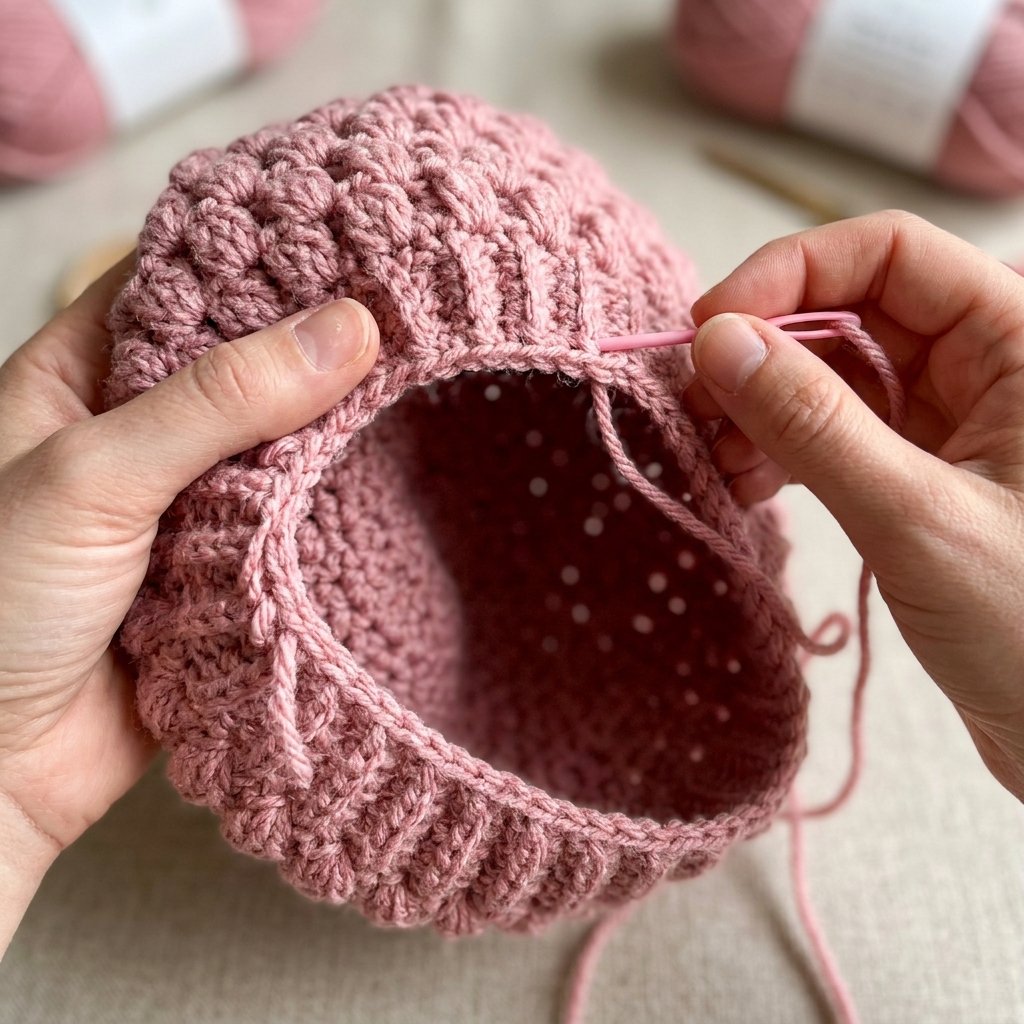
What to do: Attach one long edge of the band to the bottom of the hat.
How to do it:
- Slip the band ring over the hat’s bottom opening so the band hangs down from the hat’s edge. Line up the band seam with the start of the last round.
- With the long tail, whip stitch through the last round of the hat and the band’s long edge, taking one stitch per hat stitch. If the band has a few more rows than the hat has stitches, occasionally take two rows in one stitch to spread them evenly.
- Keep your stitches loose and even so the seam stays stretchy.
- When you reach the start, secure the yarn with a small knot and weave the end inside.
What it should look like: A ribbed band hanging evenly from the bottom of the hat. Fold the band up over the outside of the hat so the seam sits at the bottom fold, forming a folded cuff.
Step 10: Make the Pom-Pom
What to do: Make a fluffy cream pom-pom.
How to do it:
- Wrap the cream yarn around the 3 in (7.5 cm) wide cardboard about 100 times (Approximate), or use a pom-pom maker.
- Slide the loops off carefully. Tie a separate strand tightly around the middle, knot it twice, and leave two long tails.
- Cut all the loops, then fluff the ball and trim it into a round shape. Do not trim the long tails.
What it should look like: A full, round cream pom-pom with two long tails.
Finishing
- Weave in ends: Weave the tail from the top of the hat and the hat tail through the stitches on the inside. Trim the ends.
- Attach the pom-pom: Thread both pom-pom tails onto the yarn needle. Pass them through the center of the crown, from the outside to the inside of the hat, then tie them in a firm double knot inside. Weave the ends in.
- Shape the hat: Fold the cuff up neatly. If you like, give the hat a light steam or press with your fingers to shape it.
- Add the tag: With the sewing needle and thread, stitch the faux leather tag onto the outer layer of the cuff, near the bottom corner. Sew through the tag’s holes, or around its edges, a few times, and knot the thread on the inside.
Helpful Tips
- After Round 4 (the last increase round), count your stitches and check that the crown lies flat. If it doesn’t, redo it before continuing.
- To change the size, add or remove rounds in the body, or go up or down a hook size. Make the band a few rows longer or shorter to match, so it stretches slightly around the opening.
- Tie the pom-pom to the hat with a firm double knot on the inside, so it doesn’t droop.
Final Result
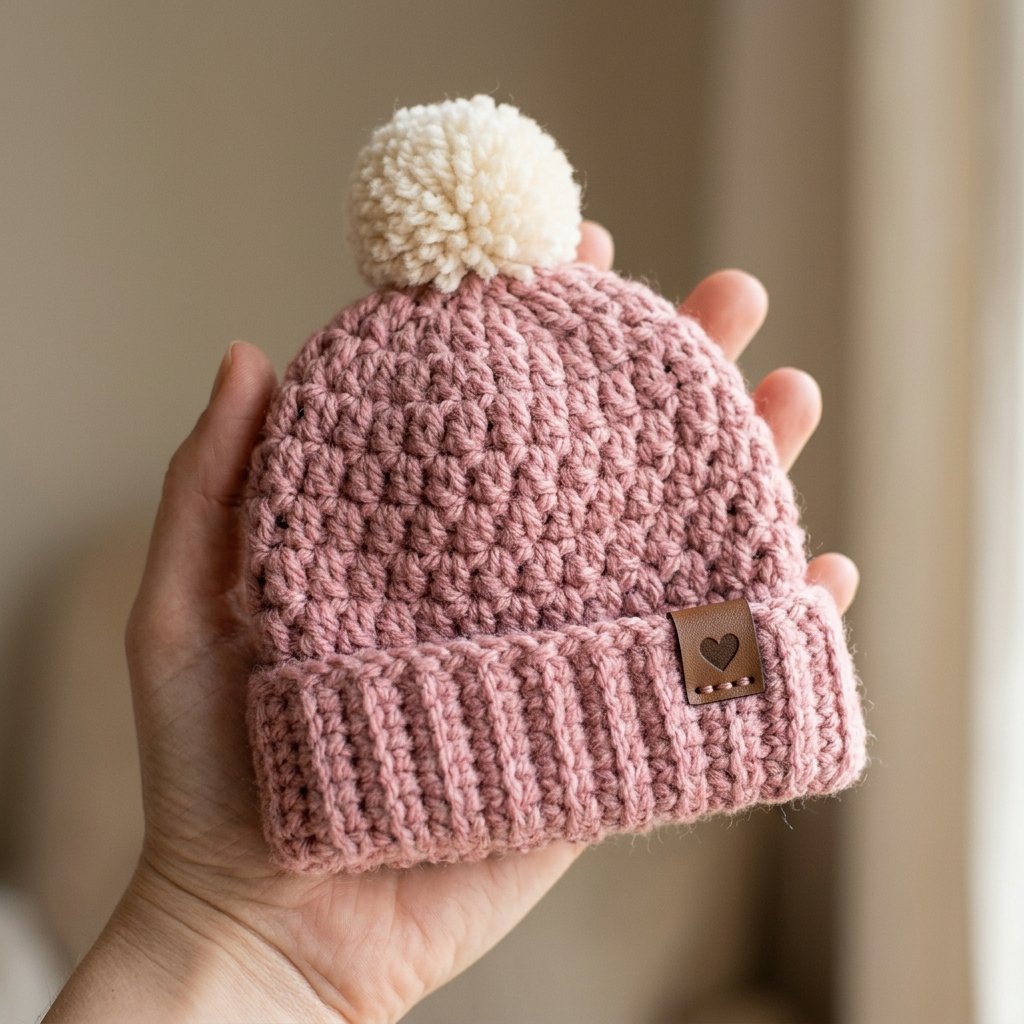
You now have a soft, textured pink hat with a ribbed folded cuff, a fluffy cream pom-pom and a small heart tag. It makes a sweet handmade gift.



 By